Texture

Basically why we are friends - this girl is wonderful
Basically why we are friends – this girl is wonderful

A big bowl of warm creamy soup is the perfect winter meal. This year, winter seemed to fly by far too quickly for me to get my fill of soup. Even though it’s been hitting 80 lately (whaaaat?!), I’m planning on making this Broccoli Potato Leek Soup at least once before it gets even warmer.

The following recipe is one that my mother has been making for years. The original recipe used 1/2 cup of cream and a stick of butter – not exactly great for you. By using olive oil and extra potatoes, my mom made it vegan, and much healthier, while keeping the creamy texture.

Texture, or  mouthfeel, is a property of food that plays a large role in our interpretation of the food. We often don’t pay attention to it until it goes wrong. Have any of you ever had ice cream that feels gritty or sandy in your mouth? That’s from the lactose in the milk crystalizing. It’s a pretty unappealing feeling and ice cream producers try to avoid it in their ice cream.

We sense this grittiness using cells called Pacinian corpuscles on our tongues. Pacinian corpuscles measure pressure, and our tongues are covered in them. We use them to determine the size of particles, to a remarkable degree. Your tongue can tell the difference between particles that are micrometers apart! We use particle size to determine the texture of a gritty or creamy food.

In order to do this, we need to be able to move our tongues. When scientists paralyzed subjects’ tongues, they could no longer differentiate between particles of different sizes.

Our ability to “measure” particles with our tongues differs from person to person, so some people may be more sensitive to sandy ice cream or creamy soup than others. Regardless of how well you can sense texture, give this soup a try before summer hits. It’s full of veggies and tastes phenomenal.

At home, my mom serves it with a warm loaf of bread and butter, which I highly recommend.

Broccoli Potato Leek Soup

Adapted from The Silver Palate Cookbook

Try to keep the vegetables about the same size so they cook evenly but don’t worry too much about chopping them perfectly since they’re going to be blended up anyway. 

Leeks are usually pretty dirty; this is the easiest method I’ve found to clean them. Trim and discard the bottom 1/2 inch or so and most of the green leafy part. Slice the remaining leek in half lengthwise and cut into slices. Toss the slices into a bowl of water, swish them around a little, and rinse them in a sieve. Repeat until leeks are clean.  

Time: 1 hour

Yield: 8-10

Ingredients:

  • 2 leeks, chopped
  • 1/4 cup olive oil
  • 1 medium onion, chopped
  • 2 teaspoon salt
  • 1 teaspoon pepper
  • 8 cups vegetable stock
  • 5 medium potatoes, peeled and sliced
  • 6 cups chopped broccoli   

Instructions:

  1. Heat oil in a large pot over low heat. Add the leeks, onion, salt, and pepper. Cook until they soften, about 15 minutes.
  2. Add stock and potatoes. Simmer uncovered for 15 minutes.
  3. Add broccoli and simmer for 10 minutes.
  4. Remove pot from heat. Puree the soup in a food processor or blender, working in small batches.
  5. Return soup to pot and heat until warm.

Adding some color

photo 2

Vision is an important aspect of how we enjoy our food. Of course, eating food that looks nice is more enjoyable but vision  plays a larger role in consumption.

Historically, we used to use vision to tell if a food was safe. The difference between an old moldy strawberry and a fresh one is instantly visually clear. We also use our vision to tell when fruit is ripe – again, picture a green strawberry versus a bright red one.

However, it important to note that vision is not always correct when it comes to food safety/ripeness. There are plenty of pathogens that are not visible to the eye.

Modern technology has also made our vision a less accurate measure of food quality. Stores know that people value the way their food looks and are more likely to buy produce that looks nice. They choose produce that has been treated with pesticides and waxes to make it look as appealing as possible, which does not always translate to tasting good.

When it comes to organic produce, vision is sometimes deceiving. Since it is not sprayed for pests, there are often more blemishes on organic produce. A lot of visually flawed organic produce tastes just as good, if not better, than its conventional counterpart. One of the stalls at my local farmer’s market has a special box for “cosmetically challenged tomatoes”, which are sold at a discount price. They taste wonderful, and its a nice way to get quality produce on a college budget.

One way that vision still helps us to eat well is that a colorful diet is often healthier. Eating a variety of colorful fruits and veggies makes it easier to get in all the vitamins and minerals we need. Studies show that people who consume more fruit and veggies tend to live longer. This may be because the produce replaces other things in the diet, such as sugar and saturated fat, or because fruit and veggies contain compounds that promote health.

One theory is that this is due to phytochemicals, which are chemicals in plants that have beneficial health effects but are not technically necessary for our survival. Phytochemicals are thought to help prevent disease, resulting in a longer, healthier life.  A lot of these phytochemicals are pigments that give plants their color, so eating a colorful diet is a great way to get them. If you’re interested in reading a little more about them, check out the fact sheet from UC Davis here.

Sometimes, especially during winter, it’s hard to fit enough color into your diet. I took a look back on my meals over the last week and realized that most of them were varying shades of brown – not so good. This week, I’m making a bigger effort to get my veggies in. I’ve been eating big salads and cooking up batches of veggies to nibble on throughout the week. I’m also going back to a summer favorite: green smoothies.

Green smoothies have gotten a lot of hype lately, and for good reason. They’re a great way to squeeze in some extra veggies without really noticing. Milder greens, like spinach, are best to start out with – you hardly notice the taste. Spinach is also easier for the standard college blender to handle than tougher greens, like kale. The amount of spinach you can put in may surprise you at first (it’s a little scary to see a blender half full of spinach) but it blends down to almost nothing.

For me, there are two main types of smoothies: meal smoothies and snack smoothies. Meal smoothies are thicker and more calorically dense. Usually, I eat my meal smoothies with bowl and spoon. On the other hand, snack smoothies are meant to be sipped. They’re light and refreshing and are a great supplement to a smaller breakfast or alone as a snack.

The following smoothie is one of my favorites. The sweetness of the spinach and banana go perfectly with the kick from the ginger and spices, resulting in a beautiful green smoothie that tastes a little like chai. It’s bright and invigorating, the perfect way to start off your morning.

You can use unfrozen banana if you like but freezing your banana first will give you a much creamier texture. I usually keep a container of peeled, sliced bananas in my freezer, which I can use later for smoothies or banana bread. Whenever I have one on the counter that is starting to brown, I just slice it up and toss it in.

I think of recipes for smoothies as more of guidelines. I tend to eyeball the measurements and tweak them to suit my tastes. I have tested the specific amounts given below and I love the smoothie this way but feel free to play around with it.

If you’ve never tried a green smoothie before, this is a great one to start off with. And if you drink them every day, this is a nice new mix of flavors. Ether way, give it a try!

photo 1

Chai Spiced Green Smoothie 

Adapted from pictures pups and pies

Time: 5 minutes

Yield: 1-2 servings

Ingredients:

  • 2 handfulls spinach
  • 1 banana, sliced and frozen
  • 1 thin slice fresh ginger (you can peel and grate it if you like, but you really don’t need to – the blender will do the work for you)
  • 1/4 teaspoon cinnamon
  • pinch of nutmeg
  • pinch of cloves
  • dash of black pepper
  • 1/2 teaspoon vanilla extract
  • 3 ice cubes
  • 1 1/2 cup almond milk

Instructions:

  1. Throw everything into a blender, with the greens at the bottom.
  2. Blend up and enjoy!

Pop!

Stovetop popcorn and peanut butter caramel

Stovetop popcorn is the perfect snack. It’s customizable, portable, low calorie, and a whole grain. Win-win all around.

Making popcorn on the stove instead of in the microwave is one of those things that sounds a little intimidating but really isn’t at all. It’s a healthier alternative than microwave popcorn and doesn’t require an air popper, which makes it perfect for the college cook.

You can leave your popcorn plain or add toppings. One of my best friends is gluten intolerant and uses her popcorn as a naturally GF “cracker” to dip in hummus. If you want to get fancy, Peanut Butter Carmel Corn takes a few minutes extra and is worth every second. I made it as a snack for a study group the other day and had to kick my roommates out of the kitchen so they wouldn’t eat it all first.

One of the fun things about making popcorn is that it forces you to use a sense that isn’t usually associated with food: hearing. As you heat the corn kernels, the water inside them changes from a liquid to a gas. The gas takes up more volume than the water and increases the pressure inside the corn kernel until it becomes too much and it explodes, with an audible pop.

Hair cells inside of our ears pick up sound waves and turn them into signals that our brains can understand. As we get older, we slowly start to lose our hair cells and the range of sounds we can hear shrinks (this how high pitched ring tones designed to be heard by teenagers, but not teachers, work).

So enjoy the full range of sound you can hear now. Listen to music (but not too loud). Chat with a friend. And make some popcorn to share.

Basic Stovetop Popcorn

I’ve given measurements but this is one of those things where I usually just dump it in. Just remember that a little bit of popcorn goes a long way. 

Time: 5-10 minutes

Yield: 8 cups

Ingredients

  • 3 Tbsp oil (coconut, canola, or safflower work best — olive oil has a lower smoking point and tends to burn but can still be used if you’re careful)
  • 1/3 cup popcorn
  • salt

Instructions

1) Pour oil into a heavy bottomed pot with a lid.

2) Toss three corn kernels into the pot, put the cover on, and heat over medium-high heat until all three pop.

3) Remove the pan from heat, pour the popcorn in, replace the cover and wait 30 seconds (this allows the popcorn to heat up so when you put it back on the stove, it all pops at once and you don’t have a million unpopped kernels at the bottom).

4) Put the pot back over medium-high heat and shake the pot back and forth, holding on to the lid.

5) The popping will gradually slow. When you hear several seconds between pops, your popcorn is done! Take the lid off right away to stop your popcorn from getting soggy and pour it into a bowl.

6) Salt to taste.

Toppings
-olive oil, sea salt, lemon zest
-hot sauce, lime juice/zest
-grated Parmesan
-nutritional yeast
-chocolate chips, slivered almonds
-raid your spice cabinet and go crazy

photo 4

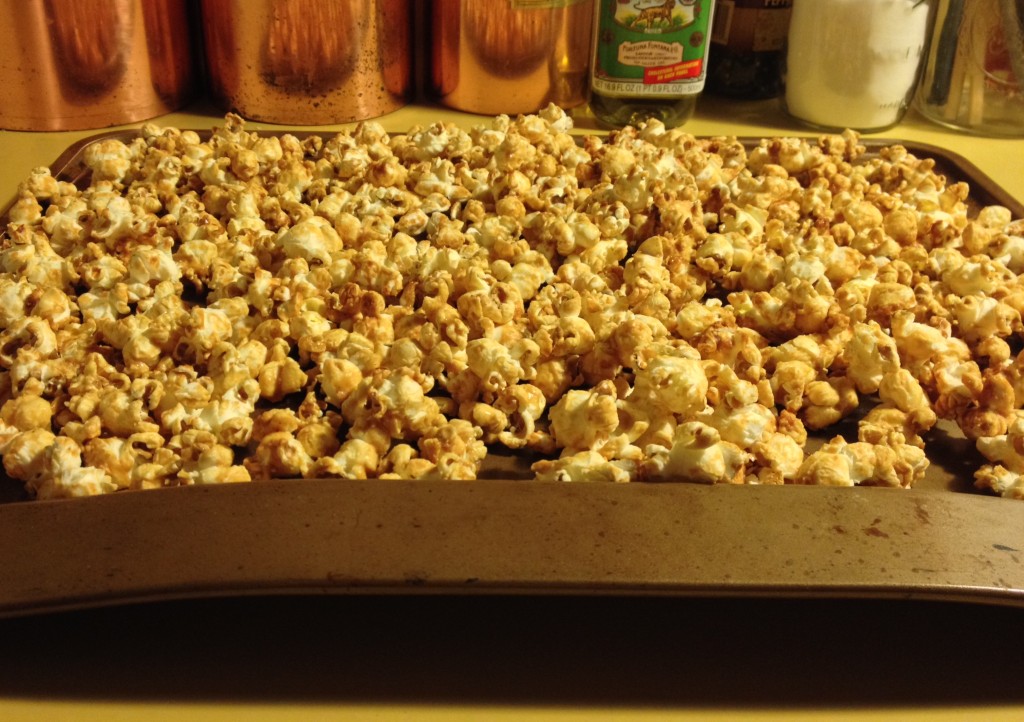
Peanut Butter Caramel Corn

The amount of popcorn is flexible, use more if you want lighter caramel corn and less if you’re really just into the carmel. 

Adapted from Healthy Food for Living 

Time: 45 minutes ( 5 minutes prep, 30 minutes baking, time to cool)

Yield: 8 cups

Ingredients

  • 8 cups plain popped popcorn
  • 2 Tbsp canola oil
  • 1/4 cup creamy peanut butter
  • 1/2 cup liquid sweetener (brown rice syrup, maple syrup, honey, agave, or a mix)
  • 1/2 tsp vanilla
  • 1/2 tsp salt (can use less if using salted peanut butter)

Instructions

1) Preheat oven to 250˚ Fahrenheit.

2) Combine oil, peanut butter, and sweetener in a small pot over medium-low heat. Heat, stirring, until it becomes smooth (about 2 minutes).

3) Remove pot from heat. Mix in vanilla and salt.

4) Mix popcorn with caramel and spread in an even layer over two baking sheets. You can mix the carmel and popcorn in a bowl or be lazy and do it directly on the baking sheets.

5) Bake for 15 minutes.

6) Remove popcorn and stir.

7) Bake for another 10-15 minutes. I start checking mine around 10 minutes and if it looks like its starting to burn, I pull it out earlier.

8) Let cool (although sneaking a few while its still hot is completely acceptable).

Texture, health, and lentil salad

photo 1

For a long time, scientists believed that the chemical makeup of nutrients was what made them important. Food itself was seen as just a vehicle for these nutrients.

(If you’re interested, Michael Pollan’s book “In Defense of Food,” is an excellent criticism of what he calls “nutritionism”. Essentially, his premise is that we have replaced food with nutrients, and with dire consequences. Great book, highly recommend it.)

I’ve always found this model to be deeply flawed. Nutrition, like most things in life, is far more complex than it seems. Now, new studies are finding that the texture of food may in fact play a critical role in its health effects.

Macular degeneration is a condition in older adults where damage to the retina causes vision loss in the center of their field of vision. It can eventually progress into blindness. My grandmother suffers from macular degeneration, and since it tends to run in the family, my mother, sister, and I all have an increased chance of developing macular degeneration.

Previously, the research done on diet and macular degeneration focused on nutrients and antioxidants that protect against the disease or minimize its effects. However, researchers at Tufts University found that the glycemic index of the foods consumed had an even greater effect that their nutrient contents.

Glycemic index is a way of measuring how much a certain food raises our blood sugar. White bread is an example of a food with a high glycemic index; if you eat a slice of white bread, you quickly get a sharp spike in blood sugar. Carrots have a much lower glycemic index. If you eat them, your blood sugar will still rise, but in more of a gentle curve than a sharp spike.

The researchers at Tufts found that patients who ate a relatively high glycemic index diet had a higher chance of developing macular degeneration, while patients who ate a low glycemic index diet had a much lower risk. You can read some of their studies here and here if you’re interested. This was proof that the physical makeup of the food itself, not just its nutrient content, could have an effect on human health.

Carbohydrates with more protein and fiber have lower glycemic indexes while processed foods tend to be higher on the scale. Lentils are a great low glycemic index food. They’re high in protein and in fiber, which makes it take longer to break down the sugars in them. Lentils are also cheap, cook quickly (no presoaking!) and taste phenomenal. They’re a staple in my kitchen, and the following lentil salad is one of my favorite ways to make them.

Dijon Lentil Salad

Adapted from Budget Bytes

I love to eat this stuffed in a whole wheat pita with some lettuce or spinach but it’s also delicious on its own. It can be eaten warm or cold. 

Time: 45 min

Yield: 4-6

Ingredients:

  • 3 Tbsp olive oil, separated
  • 1 medium turnip, peeled and chopped small (about 1/4-1/2 in)
  • 4 medium carrots, peeled and chopped small (about 1/4-1/2 in)
  • 1 medium onion, chopped
  • 1 clove garlic, minced
  • 1/2 tsp ground cloves
  • 1 cup brown lentils (uncooked)
  • 4 cups water
  • 1/4 cup red wine vinegar
  • 2 Tbsp dijon mustard
  • 1 tsp salt
  • black pepper
  • 1/2 bunch fresh parsley, chopped

Instructions:

  1. Heat 2 Tbsp olive oil in large pot over medium heat. Add carrots and turnip. Cook until vegetables start to soften and turnip begins to turn transparent, about 3-5 minutes.
  2. Dice onion. Add onion, cloves, and garlic to pot. Cook, stirring, until onions become transparent (about 5 minutes).
  3. Rinse lentils, checking for stones. Add lentils and water to the pot. Cover and bring to a boil. Lower heat and simmer until lentils are soft. Depending on how fresh your lentils are, this may take 20 minutes to an hour. Start tasting them at 20 minutes to check.
  4. Drain lentils in a sieve. Return to pot (off the stove) and add 1 Tbsp of oil.
  5. Whisk mustard, vinegar, salt, and pepper together in a bowl.
  6. Pour dressing over lentils. Add parsley and toss until mixed.

Shakshuka

photo 2

One of the problems with cooking almost all of my own food is that after a while, all my cooking starts to feel the same. I start to use the same vegetables, the same flavors, the same combinations of foods. For a while, that’s fine – I know what works for me and keeping my cooking similar is an easy way to get good, healthy food. But every now and then, I need something new and exciting to shake things up a little. Shakshuka is one of those things.

The recipe is originally from North Africa but has become popular in Israel. It’s popular for good reason – shakshuka is wonderfully spicy, warm, and comforting. It’s healthy too, with enough flavor to snap me out of a cooking rut. Plus, the name is awesome. After my first bite, I knew this was a recipe worth saving.

My roommate and I made shakshuka for brunch last week. We cooked two of the eggs for brunch and made the other two in the leftover sauce for dinner a few days later. I’ve heard that in Israel, some families make a huge batch of sauce and freeze it in individual portions to use later, which is a great idea.

One of the nice things about shakshuka is that you can control the level of spice to fit your individual preferences. Spicy food can be an incredibly divisive thing – people either love it or hate it. Personally, I fall in the former camp.

Interestingly enough, “spicy” isn’t actually a taste but rather the activation of pain receptors on your tongue. One of my roommates, who hates all things spicy, took this as proof that my love for spice is unnatural and that I have masochistic taste buds. She may be correct, but I see it as more of an example of how taste preferences can be changed. Unlike sweet food, no one is born liking spicy food but many people grow to love spice as they get older.

Regardless of your feelings on spicy food, give Shakshuka a try. At any level of spice, it is delicious.

Shakshuka

Adapted from Smitten Kitchen (http://smittenkitchen.com/blog/2010/04/shakshuka/)

Time: 45 min (10 min once sauce is made)

Yield: 4 servings

Ingredients:

  • 2 Tbsp. olive oil
  • 3 serrano peppers, stemmed, seeded, and finely chopped (can substitute jalapenos for a less spicy sauce or use fewer peppers)
  • 1 yellow onion, chopped
  • 5 cloves garlic, thinly sliced
  • 1 tsp ground cumin
  • 1 Tbsp. paprika
  • 28 oz can diced tomatoes, undrained
  • salt
  • 4 eggs
  • feta
  • parsley, chopped
  • bread

Instructions:

  1. Heat olive oil in a large pot over medium heat. Add chiles and onion. Cook, stirring occasionally, for about 6-8 minutes, until soft and starting to brown.
  2. Add garlic, cumin, and paprika. Cook, stirring frequently, until garlic softens (about 2 more minutes).
  3. Add tomatoes and their juice, along with about 1/2 cup of water. Bring to a boil, then simmer over low heat until sauce thickens, about 15 minutes. You may have to add a little more water if the sauce gets too thick. I like to bash it up a bit with a spoon to break up larger pieces of tomato and garlic. Salt to taste.
  4. Crack eggs into sauce so they are evenly distributed. If you’re worried about your egg cracking abilities and want to avoid getting shell in your sauce, crack each egg into a small bowl first and then pour it into the sauce. Cover pot and cook eggs until yolk is just set, about 5 minutes. Feel free to tweak this if you like a runnier or firmer yolk.
  5. Spoon into bowls and sprinkle with feta and chopped parsley. Serve with warm bread.

Brussels Sprouts and Smell

To everyone who thinks they hate brussels sprouts: you just haven’t tried them the right way. Brussels sprouts can be delicious but when done wrong, they are indisputably terrible. If overcooked, they can turn into grey, mushy, flavorless blobs that smell like sulfur and death.

Our sense of smell is incredibly complex. Smells are detected by multiple odor receptors and the multiple signals are then combined and interpreted by our brain. Our olfactory genome is one of the largest subsets in the human genome – we have invested quite a bit into our sense of smell. 

This explains why certain smells can have such strong memories associated. I can’t smell my mother’s perfume or my first boyfriend’s soap without thinking of them. Smells can have negative memory associations as well – my professor gave the example of alcohol, specifically the first alcohol that makes you throw up. Those who have had the unfortunate experience of testing their boundaries can vouch that the smell sticks with you.

Unlike taste, our preference for certain smells is learned, not innate. So when we smell overcooked brussels sprouts, our dislike isn’t of the smell itself but rather of the associated taste. Maybe some of you just need a better taste to associate with the smell. After all, these little cruciferous veggies are packed full of nutrients and are a great addition to your winter dinners. Here are two brussels sprouts recipes that I love:

Caramelized Brussels Sprouts

from Eat, Live, Run (http://www.eatliverun.com/caramelized-brussels-sprouts/)

These caramelized brussels sprouts are one of my favorite simple winter dinners. They’re quick to throw together and taste like candy while still being good for you. I like them over whole wheat pasta, sometimes with a fried egg on top.

Roasted Brussels Sprouts

from Wigg’s Modern Life (http://iamthebeholder.wordpress.com/2009/10/30/the-grossest-vegetable-invented/)

Almost every vegetable is better roasted and brussels sprouts are no exception. These may not look pretty but trust me, they taste good enough to make up for it. The balsamic vinegar is a nice complement to the sweetness from the roasting.

So if you think you hate brussels sprouts, give them another try – they might surprise you.

Coffee

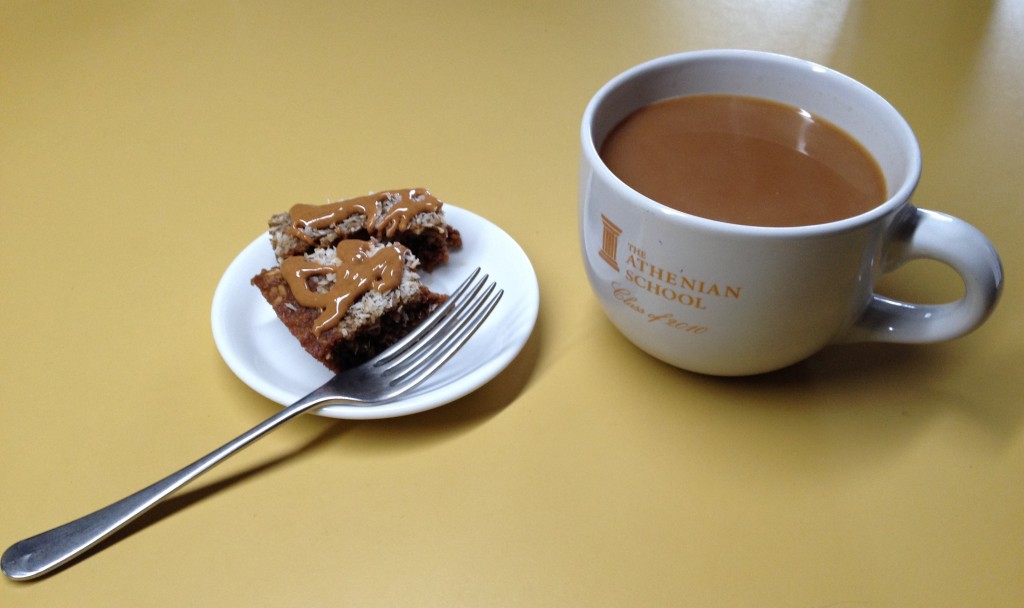
Because sometimes physics quizzes mean cake for breakfast

A good cup of coffee is one of my favorite things in the world. I love the smell, the taste, and the simple ritual of setting aside a few minutes of the day to relax.

Taste

Coffee is prevalent on college campuses but there are some that don’t share my love for it. About 25% of the population are called supertasters. They have a greater amount of tastebuds on their tongue and as such, are very sensitive to bitter tastes, like coffee. Supertasters are also sensitive to sweet tastes and don’t like to eat a lot of sugar, which means that they are rarely overweight. Interestingly enough, more women than men are supertasters – perhaps to allow pregnant women to better detect poisons that could harm their babies.

Another 25% of the population are nontasters, meaning they have a smaller amount of tastebuds on their tongue. Bitter tastes, like coffee or dark alcohol, are no problem for these people. Because they are less sensitive to flavors, they may overeat salty and sweet foods, causing them to gain weight. On the bright side, nontasters have a lower risk of cancer and heart disease even though they have a greater risk of obesity. This may be because nontasters are less sensitive to bitter tastes, they are more likely to eat their vegetables, which decreases their risk of disease. Nontasters are more likely to be men.

Coffee is also a fascinating example of personal taste preferences. I take my coffee the same way my mother does – dark, strong, and with a touch of cream. I love to find out how others take theirs. It’s one of those quirky little everyday differences that people have, which I think are so interesting. A friend of mine works as a firefighter and takes his coffee pitch black. When I asked him why he drank it that way, he said that after years of having firehouse coffee he just learned to like it. For me, this was a perfect example of how our surroundings and our history can affect our taste preferences.

Health

As much I love my coffee, there are some health effects that I need to take into consideration. It seems like every week, a new study comes out on coffee. It’s good for you, and then it’s bad for you, and then all of a sudden it’s good for you again!

Personal genetics play a role in the health of coffee too. My professor showed us a study on how caffeine affects the risk of having a heart attack. For people with one genotype, their risk decreased with additional cups after the first. For another group, their risk rose with every cup of coffee they had. If you were in the second group, you might want to avoid coffee. The first group could happily drink four cups a day without any risk to their heart.

As we move toward a world where nutrition is more personalized, it will become easier to get genetic tests and find out which group you fall in. For now though, wading through all the conflicting health reports on coffee can be confusing and I choose to deal with it by enjoying my coffee in moderation. Most experts agree that 200-300 mg of caffeine a day (about 2-4 cups) is safe; I try to stick to 1-2 (admittedly large) mugs of coffee a day.

Sources/Further Reading:

Making Coffee

Occasionally, I’ll buy coffee on campus or at a cafe but it’s too expensive to make it an everyday habit. In college, I’ve tried a couple different methods for making my own coffee. I tried a coffee maker, French press, and plastic one cup coffee filter cone before finally settling on the filter cone. My main problems with the coffee maker and French press was that they made more coffee than I wanted and were a little harder to clean but I know plenty of people in college who happily use them.

The plastic filter cone (like this http://www.peets.com/coffee/coffee-equipment-41/brewing-equipment/filtropa-cone-2.html) was the first coffee maker I learned how to use, and is still my favorite. It’s cheap, simple, easy to clean, and doesn’t take up too much space – all important factors in my college kitchen.

The coffee will taste better if you grind it yourself. Freshly ground coffee tastes better but I tend to grind a few cups worth at a time, for convenience. Store it in an airtight container in a dark place.

photo 3

How to use a plastic coffee cone

 I like to make the coffee in a tea pot if I’m making it for multiple cups so I don’t end up with one strong cup and one weak one. You can also switch the filter from cup to cup.  

Time: 3 minutes

Yield: 1 cup

Ingredients

  • 2 heaping Tbsp. ground coffee
  • water

Instructions

  1. Boil water.
  2. Place the coffee cone over a mug and put a paper filter into the cone.
  3. Pour water into the cone until the filter soaks it up. If you use boiling water, it will warm up the filter and mug, keeping your coffee hot. I’m impatient and like to drink my coffee right away so I rinse my filter with cold water instead, resulting in slightly cooler coffee.
  4. Dump the ground coffee into the filter.
  5. Pour about two times the amount of water as coffee into the filter and wait 30 seconds (you can skip the waiting if your coffee is freshly ground or if you are in a hurry – it’s really not that big of a deal).
  6. Keep pouring water into the filter until your cup is full.

Sweet Tooth

Looks a little funky, tastes awesome

We are biologically hardwired to like sweet things. Give a baby something sweet and they smile. Sour or bitter? Not so much.

One of the reasons sweet things taste so good to us is that sweetness is a sign that a food is calorically dense. In our caveman days, this was crucial to our survival. Hunter/gathers needed to get as many calories as efficiently as possible in order to live. Today, we still have our caveman physiology but we live in an entirely different world. Food, especially sweet food, is far from scarce but our bodies haven’t realized that getting as many calories as possible is no longer optimal.

A little bit of sweetness is delicious and wonderful but in excess, it can be awful for our bodies. We metabolize sugar differently than other foods and turn the majority of the calories from sugar into fat. Since sweet foods tend to be calorically dense, too much sugar can easily lead to obesity. Sugar can also cause Type 2 Diabetes which, along with obesity, is becoming more and more prevalent in our society.

With all the hype about sugar, it can be tempting to try to cut it out completely but I don’t think that is the answer, especially for college students. There is nothing wrong with enjoying sweets in moderation and feeling deprived can backfire, leading to binges.

Furthermore, I don’t believe in labeling any food as “bad” or feeling guilt and shame about consuming it. I think Dan Savage put it best when he said:

“Our bodies are our own…they’re ours to use, abuse, and, since we’re all going to die one day, they’re ours to use up. Sane adults strike a balance between taking care of our bodies—eating right, drinking in moderation, getting exercise—while still allowing for pleasures that require us to eat poorly, drink in excess, and lie motionless for days at a time while we recover. The better care you take of yourself—the more time you spend eating right, drinking in moderation, and exercising—the longer you’ll live, of course, and the more pleasures you’ll get to enjoy before you inevitably croak.”

http://www.thestranger.com/seattle/SavageLove?oid=2472796

For me, that means eat the cupcake. Enjoy it. It’s awesome. But maybe stop at one, and make sure to get those veggies in too.

When it comes to sweets, moderation can be hard. What works best for me is to keep my “everyday sweets” on the healthier side and save sweets that are higher in sugar for special occasions. For my normal baking, I try to rely on natural sweeteners, like fruit, instead of added sugar. Fruit does have sugar in it but is also high in fiber, which slows down the absorption of sugar and keeps you full longer. In addition, fruit is full of beneficial vitamins and minerals. Bananas and dates are two of my favorite fruits to replace sugar with.

photo 2
Peanut butter date cookies

I’m not a fan of most commercial energy bars, as they tend to be extremely high in sugar while masquerading as healthy. When you read an ingredient list, the ingredients are listed in order of proportion. The first ingredient is the greatest amount and they get progressively lower as you go down the list. Take a look at your energy bars – most of them start out with brown rice syrup or glucose syrup, which are alternative names for sugar. The following peanut butter date cookies are one of my favorite energy bar alternatives. The taste amazing, the fat from the nuts keeps me full, and all the sweetness comes from dates.

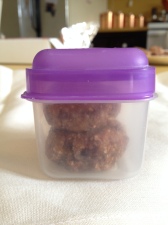
All packed and ready for school!

Peanut Butter Date Cookies 

A food processor would probably work best for this recipe. I don’t have one so I use my blender and it takes a little more coaxing but works fine. It’s easiest with soft dates so if yours are too hard, soak them in hot water for a few minutes to soften them up. 

Adapted from Sprouted Kitchen (http://www.sproutedkitchen.com/home/2013/1/16/peanut-butter-bites.html)

Time: 10 minutes

Yield: about 15 cookies

Ingredients

  • 1/2 cup oats
  • 1/2 cup almonds
  • 1 tsp. vanilla
  • 1/2 tsp. cinnamon
  • 1 cup pitted dates
  • 1/2 cup peanut butter
  • pinch of salt (if using unsalted peanut butter)
  • 1/4 cup chopped dark chocolate or chocolate chips (optional, but highly recommended because everything is better with chocolate)

Instructions

  1. Pulse the oats in a food processor or blender until you get a fine meal.
  2. Add the almonds and pulse until they are coarsely ground.
  3. Add vanilla, cinnamon, dates, peanut butter, and salt and pulse together until everything is blended together. If it seems too dry to hold its shape when pressed together, add more peanut butter.
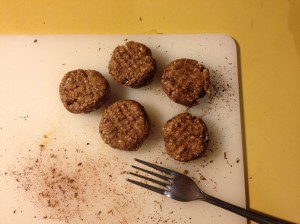
  4. Use a tablespoon to scoop the mixture and roll them into balls. If you want to get fancy, you can use a fork to make a cross-hatch pattern by pressing them down with the fork, turning the fork 90 degrees, and pressing them down again.
  5. Store covered in the fridge if you’re going to eat them quickly or freezer if you want them to last longer.